Our rooftop farmers’ tips for starting your spring seedlings.
With spring looming, it’s about time to get those seedlings started for your future balcony or backyard gardens. Seeding now (or soon-ish) gives your seeds time to germinate and grow strong enough roots to plant outdoors after the last frost (even though it feels far away!). Our team consulted with the pros, aka our rooftop farming crew upstairs, for their best-of tips and tricks. Below is our straightforward guide to get you started, complete with suggested supplies!
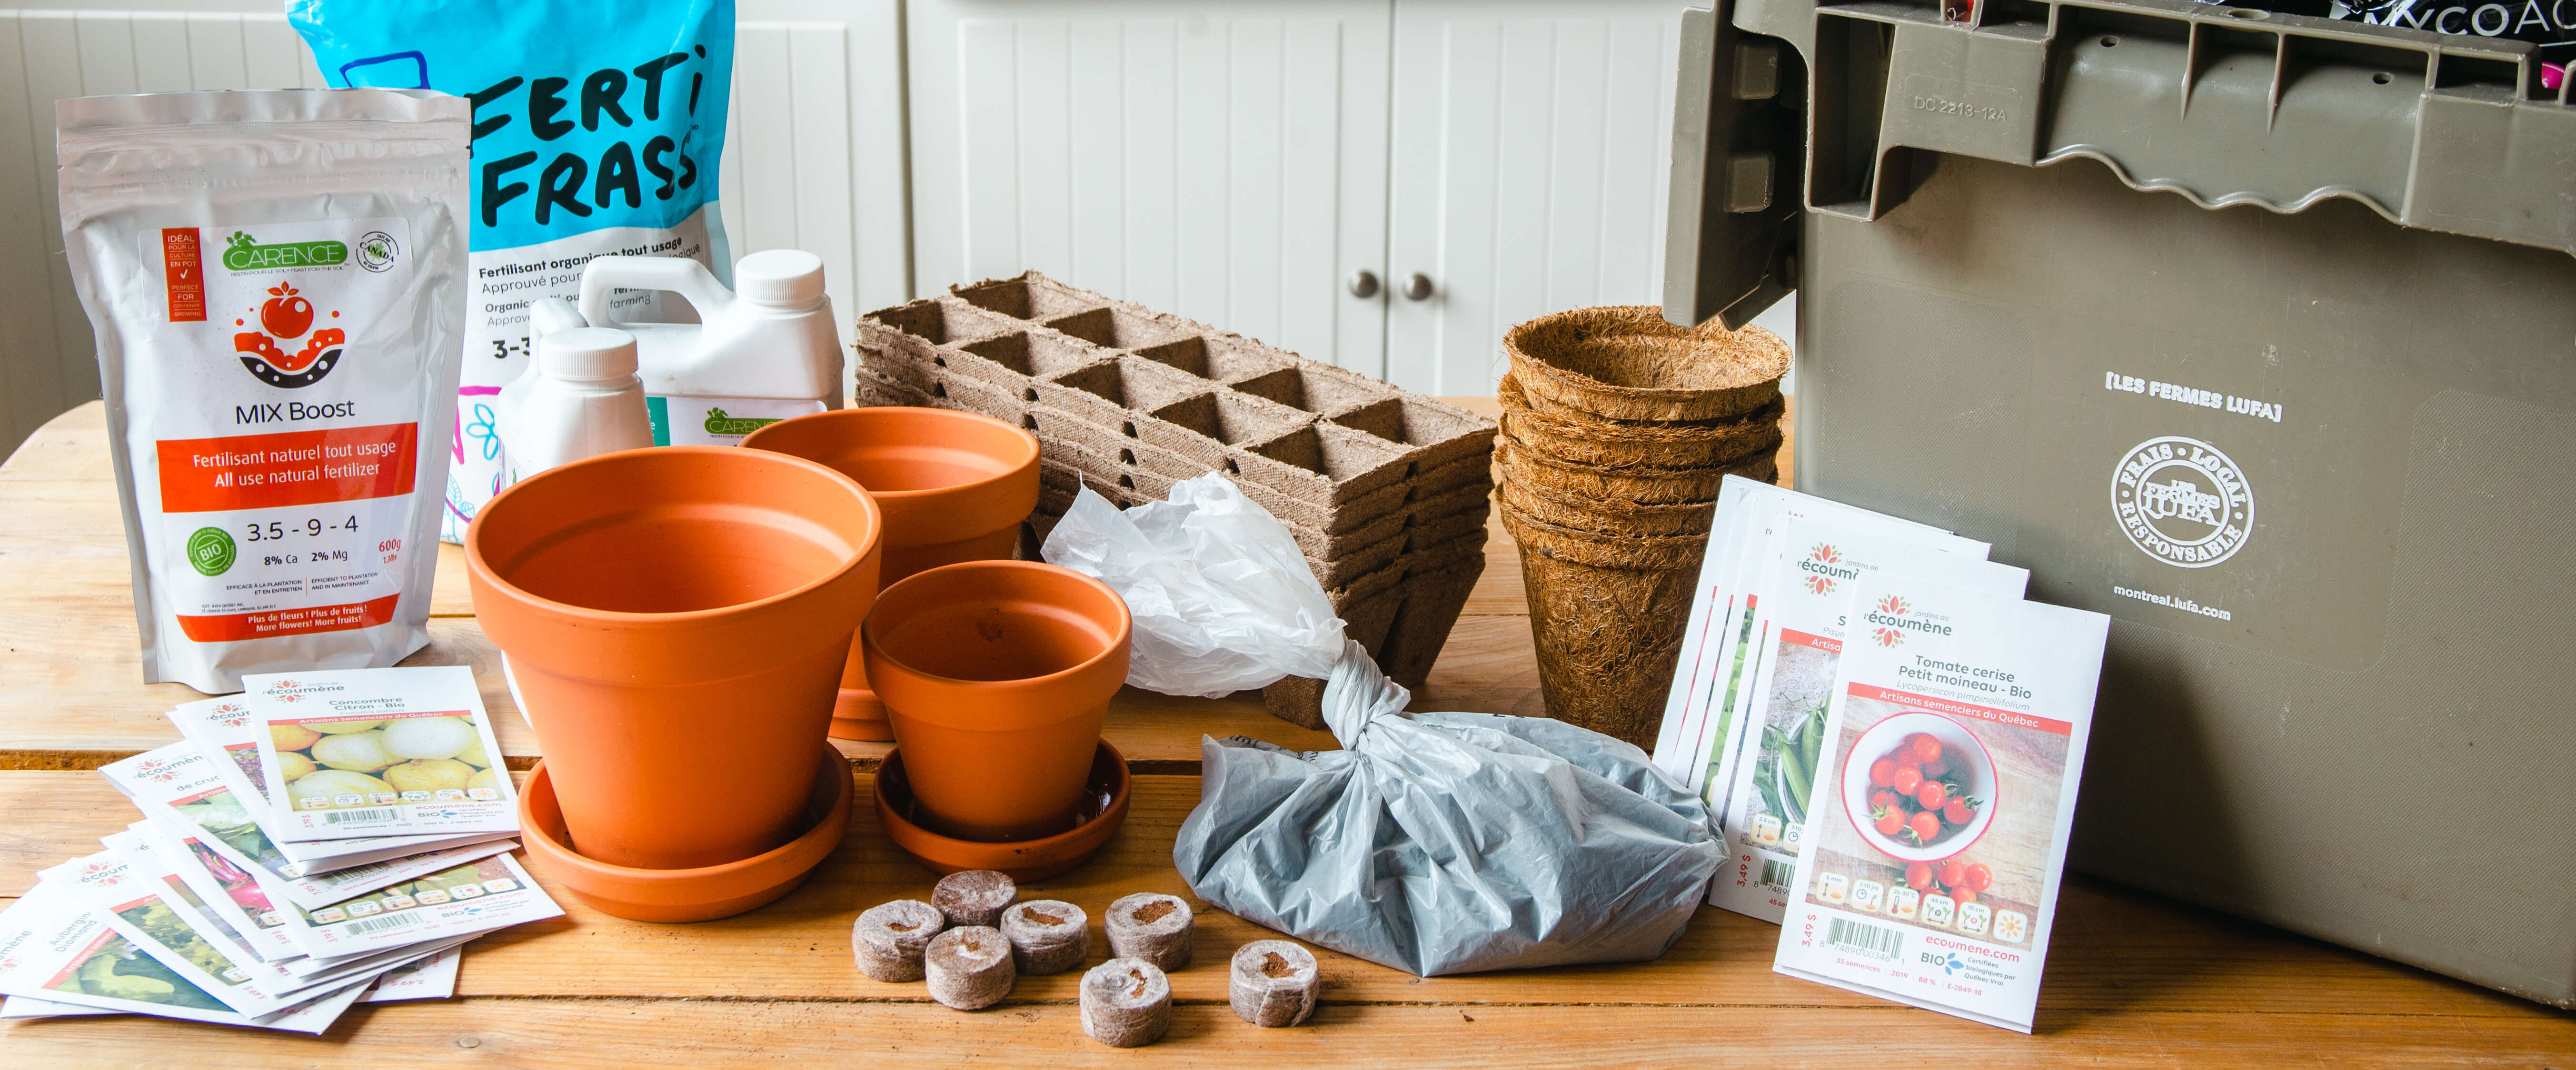
1. Head to our Marketplace to gather your supplies.
- Seeds: Each spring, our Marketplace is filled with tons of organic seed varieties from our friends at Jardins de l’Écoumene.
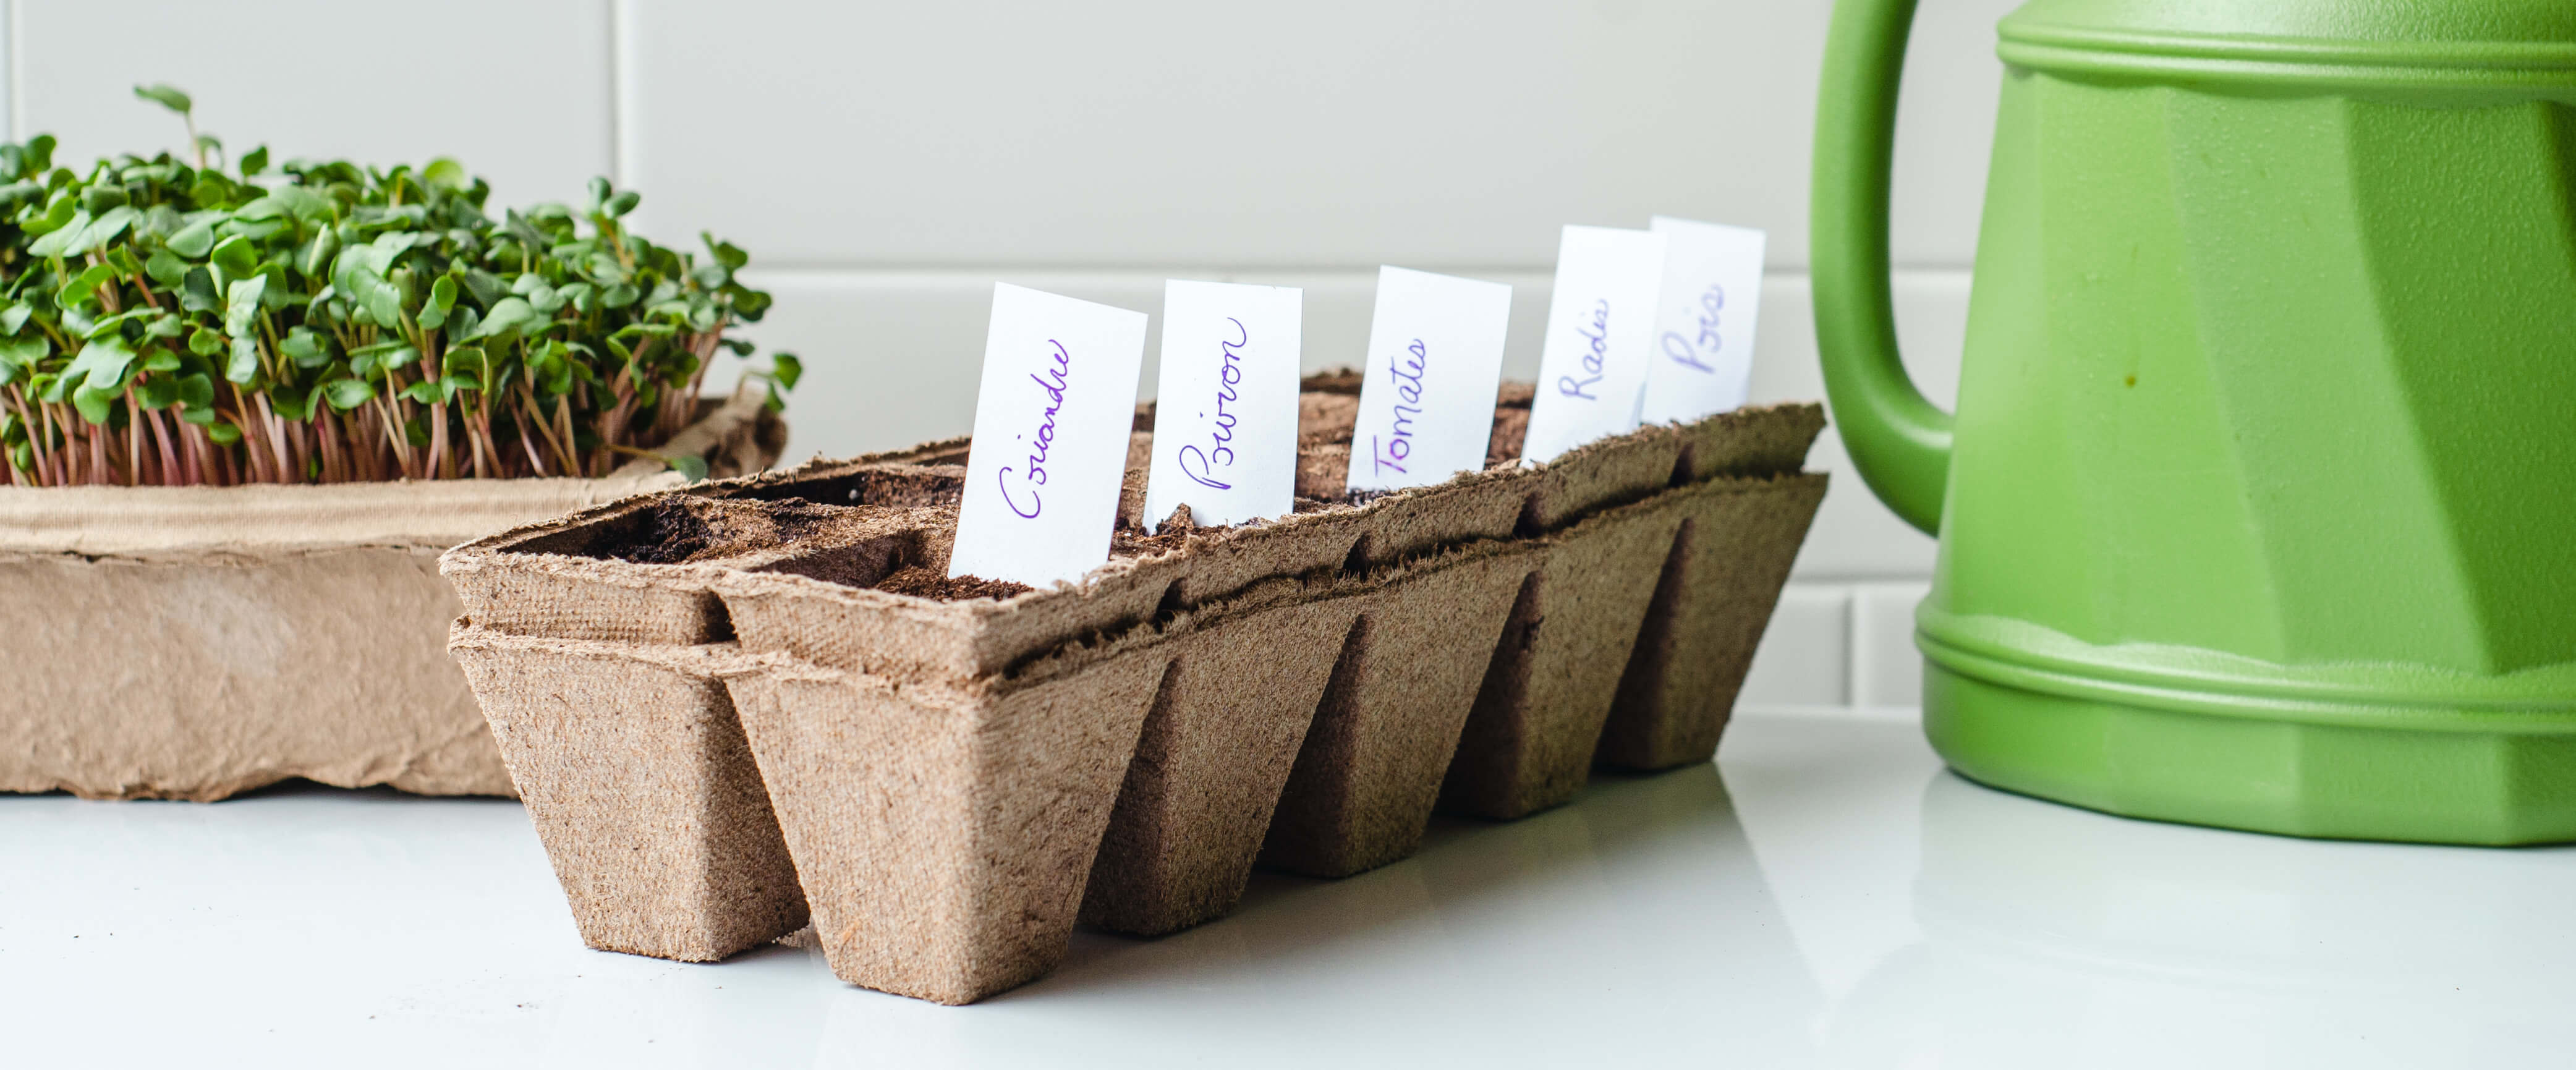
- Germination tray: These biodegradable culture trays are great for starting your crops. Depending on the size of the seeds, each cell can hold one or more. When it's time to transplant them, you can easily separate the cells by tearing the fabric without disturbing the roots, then plant them out.
- Team tip! Our rooftop tomato cartons and egg cartons are solid options for DIY seedling trays too.
- Potting soil: For best results, use new potting soil or seedling soil.
- If you're using soil that's been stored in your shed over the winter, add a little fertilizer like organic multi-purpose since older soil has lower nutrient levels and moisture content.
- Pellets for seedlings: Instead of soil, you can use these handy pellets. Place them in a tray, water them, and watch as they expand!
- A small shovel or a spoon.
- A watering can.
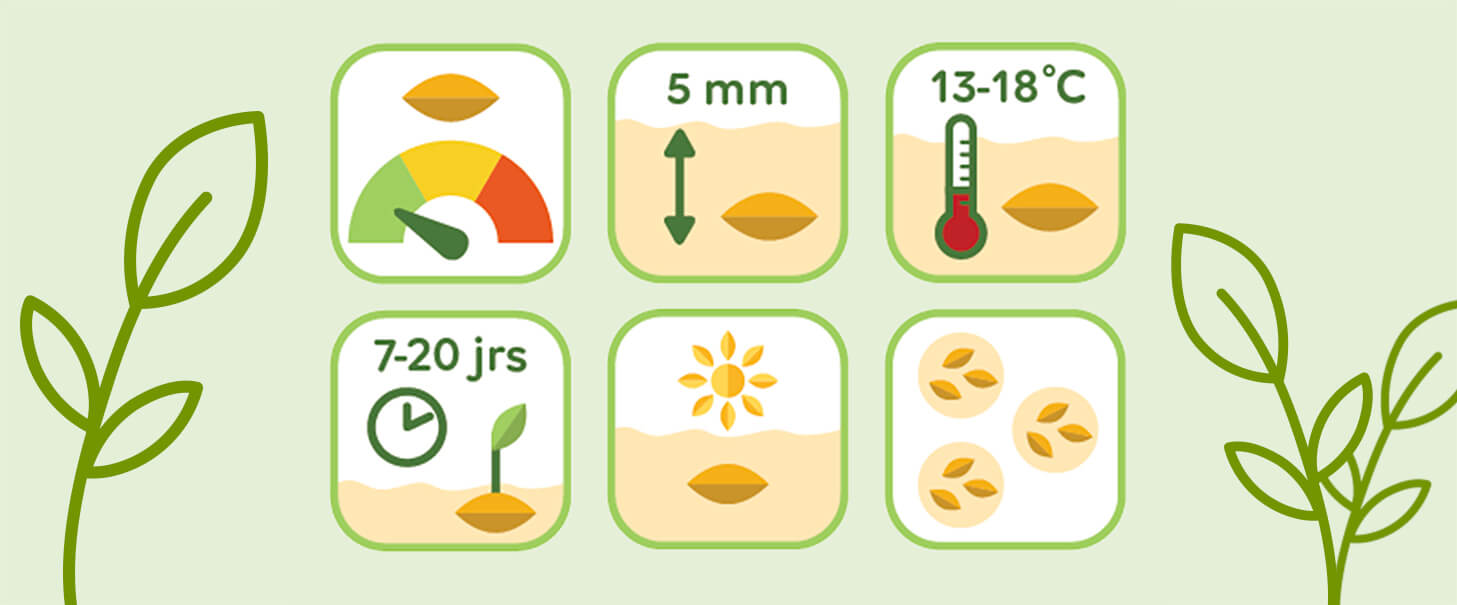
2. Carefully read the bottom of your seed packets.
- Since each seedling is different, you’ll want to plan out the ideal time to plant your seeds. For the more organized bunch, Jardins de l’Écoumène has some helpful free seedling calendars.

3. Prep your trays or your pellets.
- Trays: You can fill the cells with potting soil up to about 1 cm from the edge.
- Pellets: Place your pellets in a shallow tray and water them until they expand.
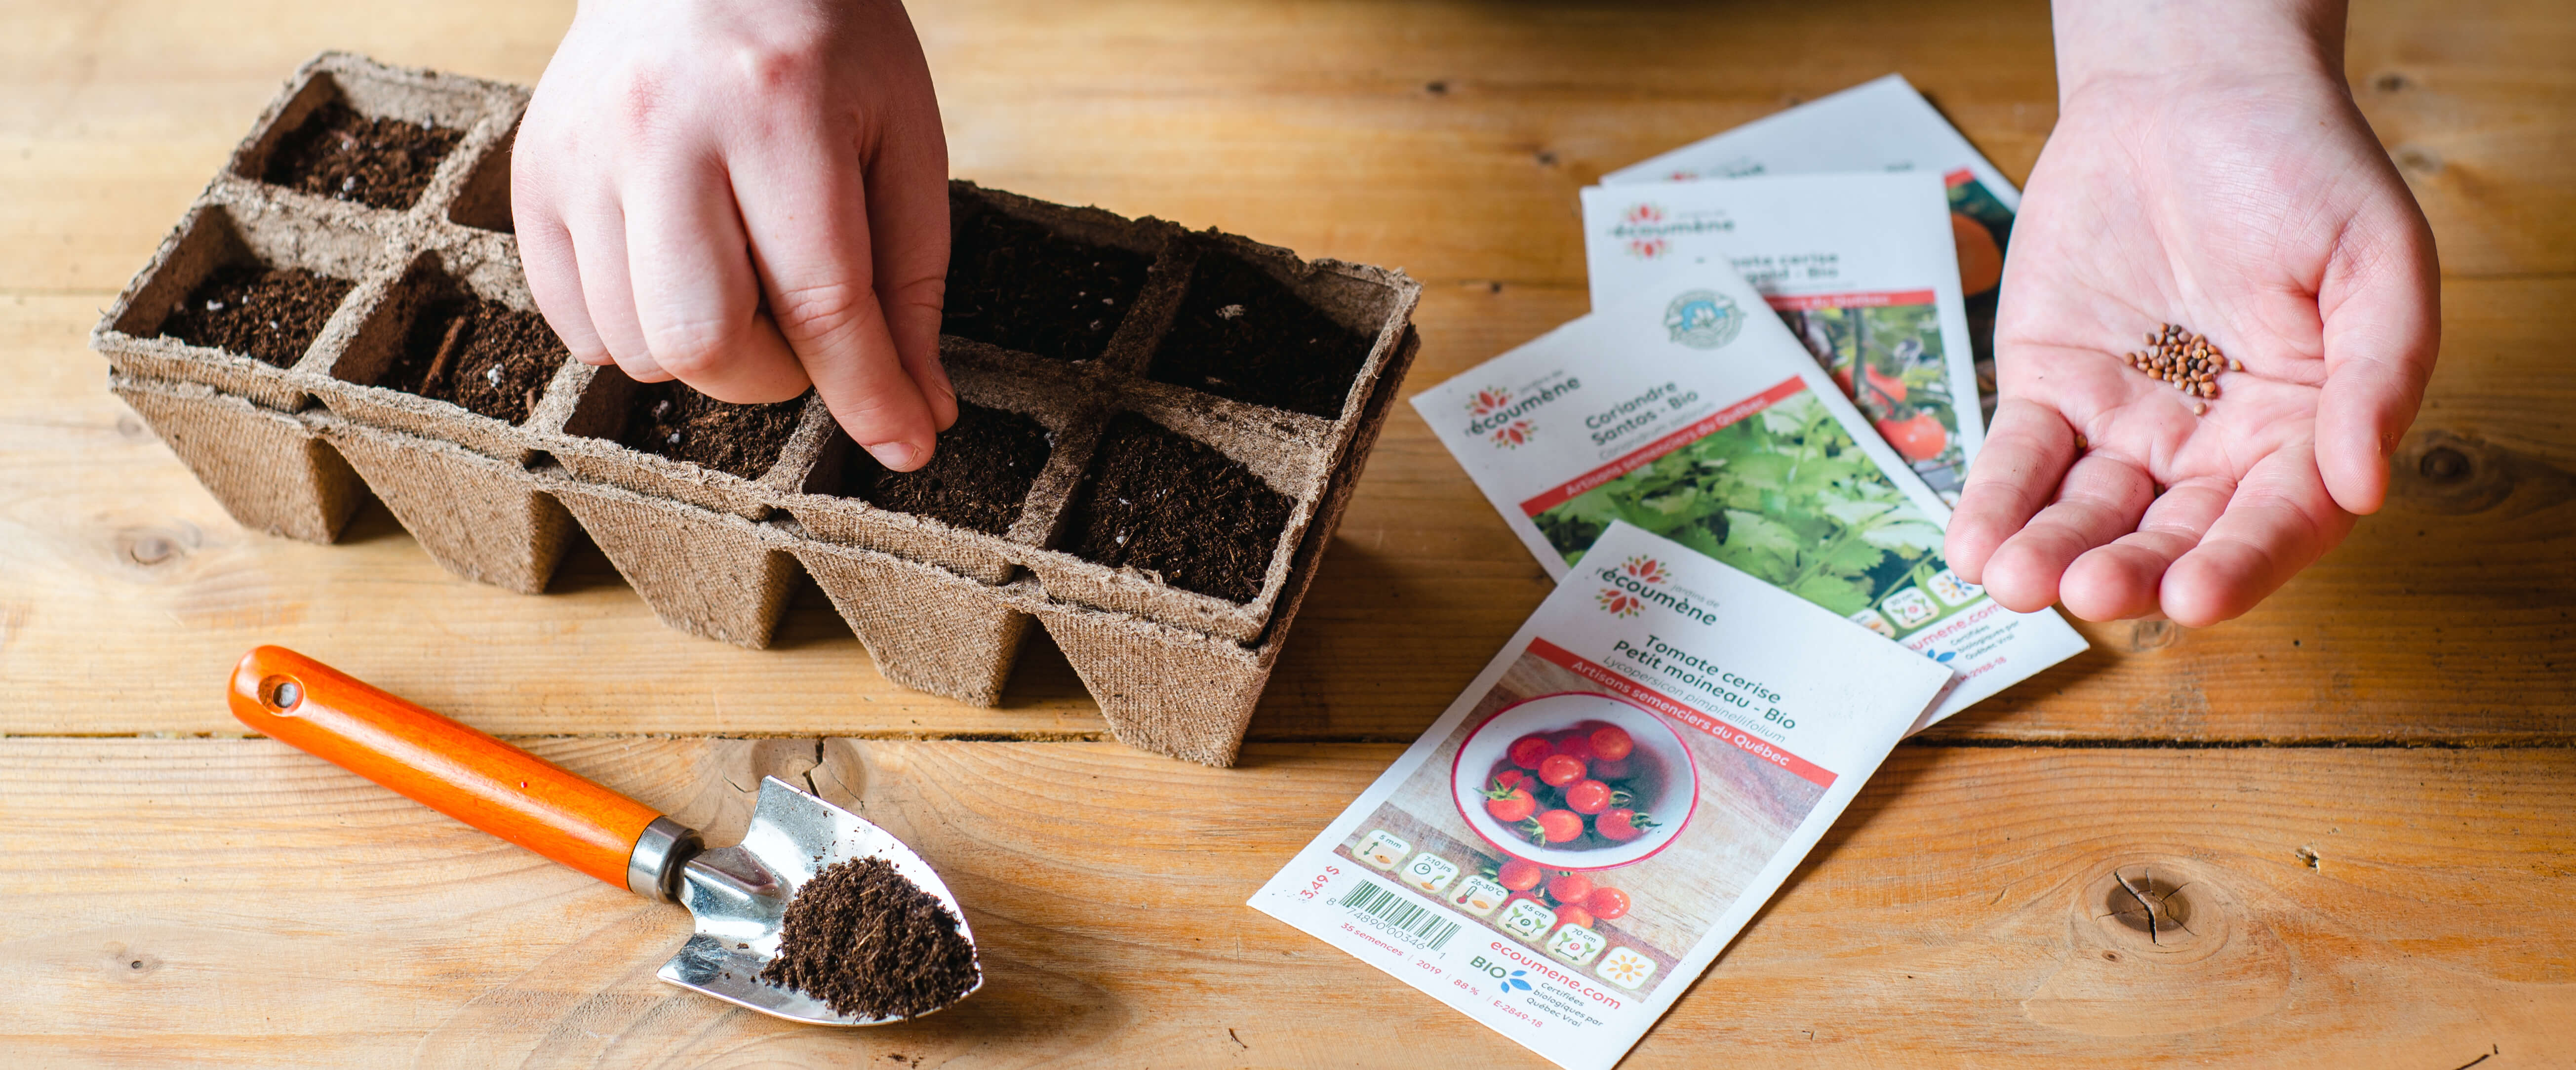
4. Plant your seeds! Be sure to plant them according to the instructions on the package.
- Trays: When it comes to seeds, size matters - the bigger the seeds, the deeper you press them into the soil, and the smaller the seeds, the shallower they should be placed.
- Pellets: Once it’s expanded, drop your seeds into the pellet’s pre-made hole and pinch the top to seal it. Wait until ⅓ of the pellet is dry before you water it again.
- Team tip! If the seeds are too small, you can fill the hole with sand to seal.

5. Label your seeds.
- Young sprouts are hard to differentiate, and all have different needs, so you won’t want to skip this step.
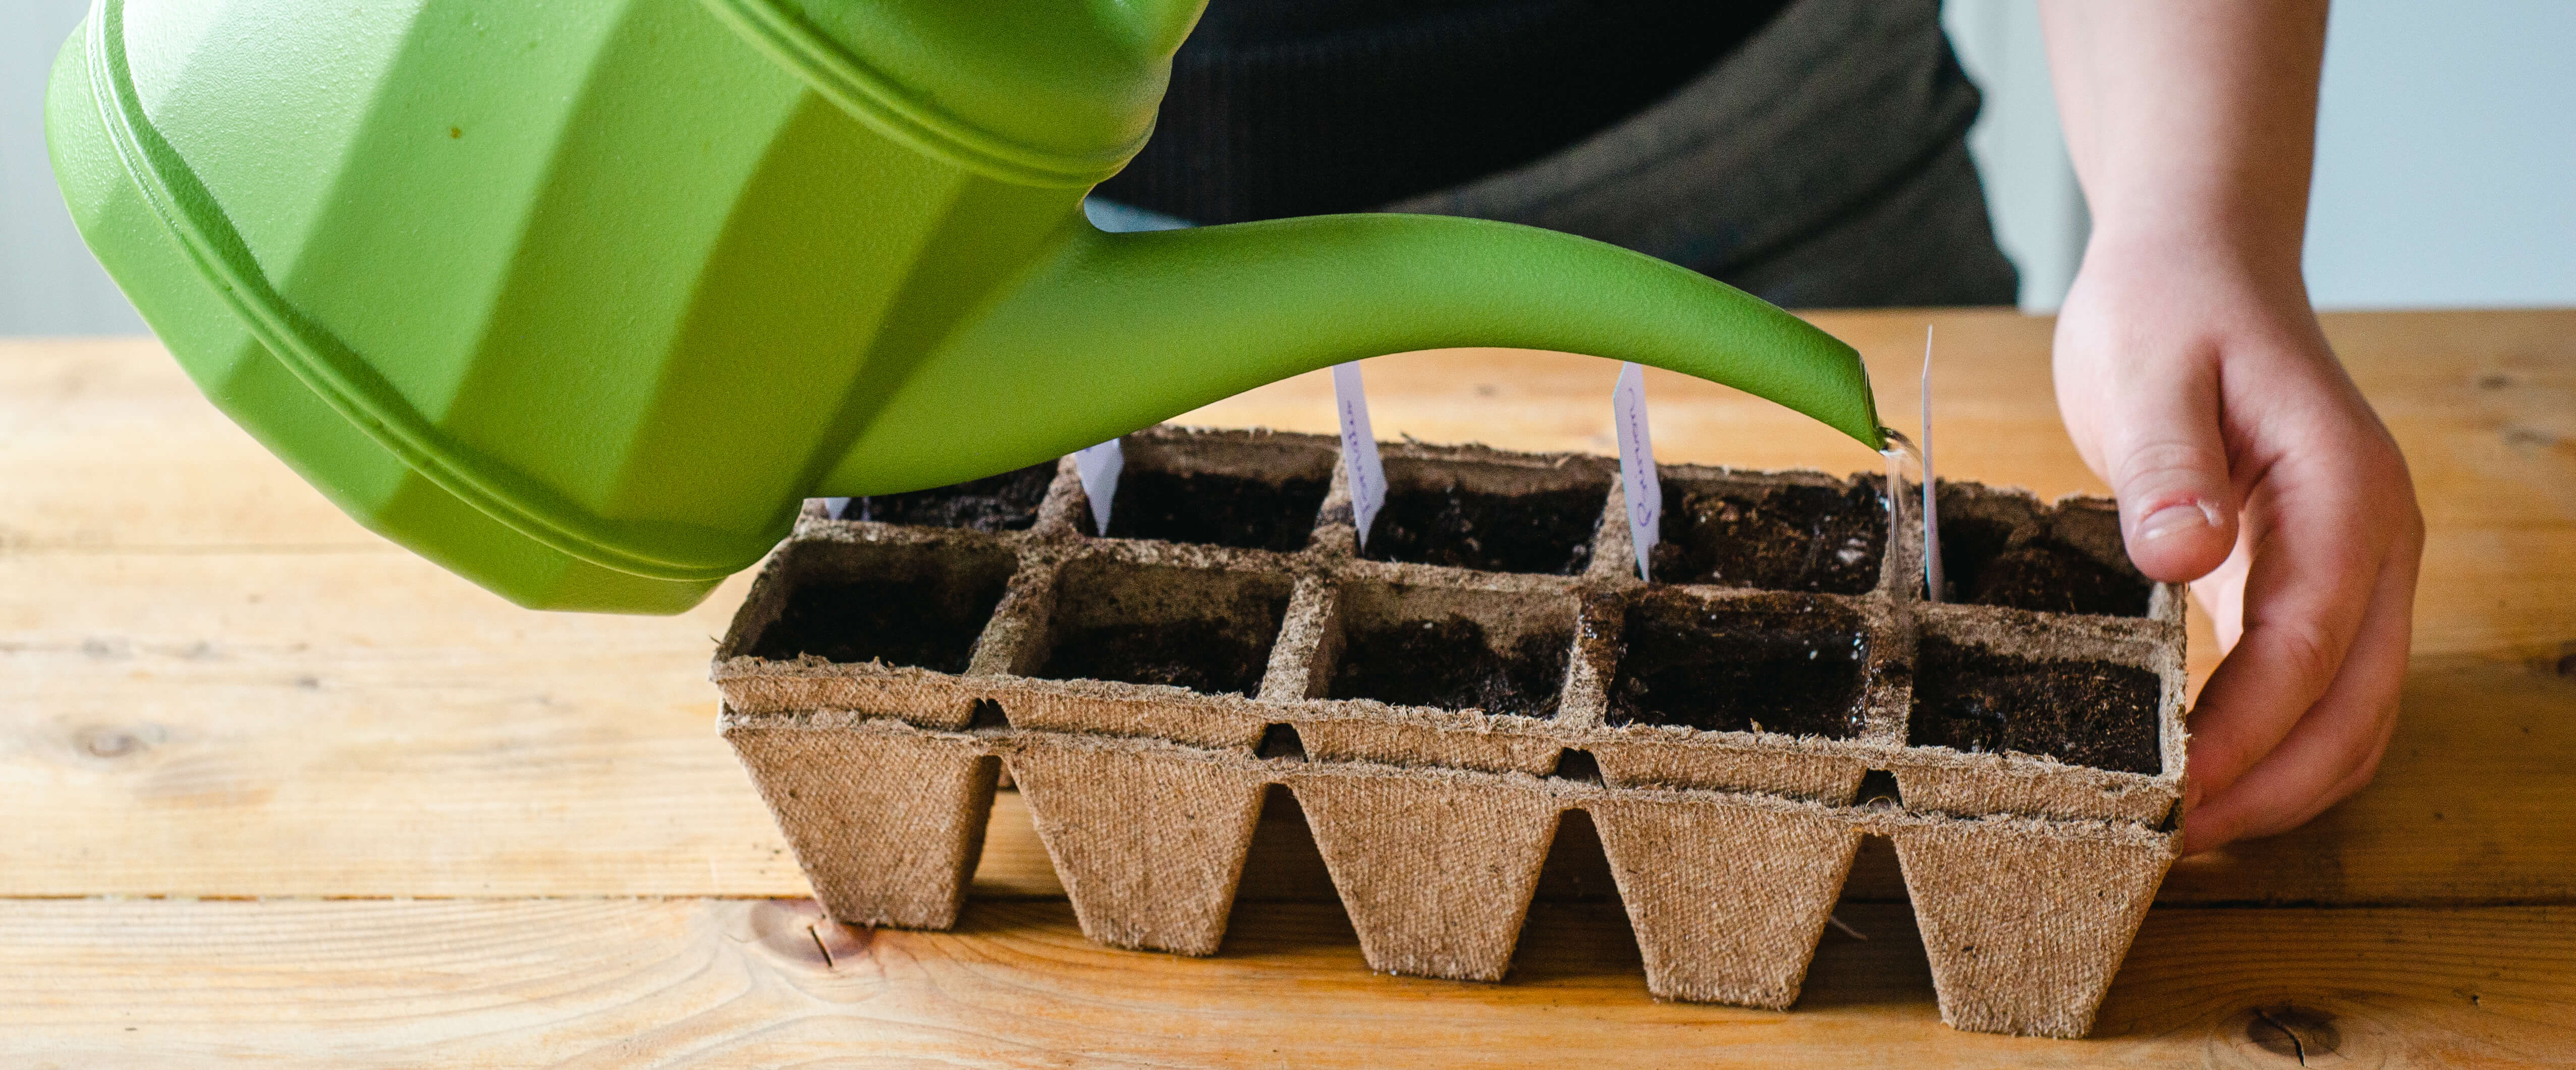
6. Give your seeds water and light.
- Place them in a warm, sunny spot and water according to the frequency indicated on the seed package.
- Team tip! Seedlings will thrive with consistent watering routines. Don’t wait until they dry out too much, and definitely don’t obsessively soak them and let them sit in standing water!
- Humidity is key: Your seedlings will flourish in a humid environment.
- Team tip! You can use a plastic dome or a compostable Lufa Farms bag to cover your tray and create this environment. Remove this once if you notice excessive humidity or once the seedlings have sprouted well.
And voila, watch your thumb turn green as your seedlings come to life! Keep an eye out for another guide to help out during transplant season. Oh, and if you follow these stellar steps and still epically fail (we’ve all been there), we’ll have ready-to-plant seedlings for you - coming to the Marketplace in the spring.